

Table of Contents
- Why Decluttering Before Moving Matters
- Create a Moving Decluttering Timeline That Works
- Room-by-Room Decluttering Strategy
- Master the Four-Pile Method for Decluttering
- What to Throw Away When Moving
- How to Sell Items Before Moving
- Digital Decluttering Before Your Move
- Involve Family and Friends in the Decluttering Process
How to Declutter Before Moving: A Step-by-Step Guide
Last Updated: July 7, 2026
Moving is stressful, yet most people approach it without a plan. Households that declutter before moving reduce packing time by 30-40% and save significantly on transportation costs. This guide covers how to declutter systematically, room by room, so you can start your next chapter lighter and more organized.
The real problem isn’t that decluttering is hard, it’s that people wait too long to start. Below, we’ll show you exactly how to sort through accumulated items, decide what stays and what goes, and make the entire moving process less overwhelming.
Why Decluttering Before Moving Matters
Decluttering before moving is about making a conscious decision regarding what deserves space in your new home. When you move without decluttering, you’re paying to transport items you don’t want. Movers charge by volume and weight, so every extra item costs real money.
Arriving at a new place surrounded by clutter means starting your fresh beginning in chaos rather than clarity. Clients who declutter first experience less stress, unpack faster, and actually like their new spaces from day one. The process forces you to confront what you own and why, extending clarity far beyond moving day.
Decluttering also lets you design a home that reflects who you are now, not who you were five years ago.
Start decluttering at least 6-8 weeks before your moving date. This gives you time to sell items, arrange donations, and avoid last-minute panic decisions.
Create a Moving Decluttering Timeline That Works
The biggest mistake is treating decluttering as a weekend project. A typical home requires 4-8 weeks of consistent effort.
Your timeline depends on home size and accumulated items. A one-bedroom apartment might take 3-4 weeks; a three-bedroom house could take 8-10 weeks. The key is building momentum early and maintaining consistent progress.
Start Early and Avoid Procrastination
Procrastination kills decluttering projects. People delay because they dread the emotional labor or feel overwhelmed by volume. The fix is simple: start before you feel ready.
Pick a moving date, then count backward 8 weeks. That’s your decluttering start date. Write it down and tell someone about it.
The first week is hardest because you’re building the habit. Once you complete your first room, momentum takes over. Many find starting with an easy room like a bathroom builds confidence. Save emotionally difficult spaces for weeks 4-6, when you’ve developed better decision-making skills.
Commit to one specific area per week instead of trying to declutter everything at once. This prevents burnout and keeps the project manageable.
Set Weekly Milestones
Break your 8-week timeline into specific, measurable milestones:
Week 1: Bathrooms and kitchen
Week 2: Bedroom closets
Week 3: Living room and entertainment items
Week 4: Garage, storage, and seasonal items
Week 5: Basement or attic
Week 6: Sentimental items and photo collections
Week 7: Final sweep and last-minute decisions
Week 8: Final packing and moving prep
Each week, identify the specific room or category you’ll tackle. Before starting, set up your sorting area and gather supplies.
Setting weekly milestones transforms decluttering from an overwhelming task into manageable, achievable steps. Completing one milestone per week keeps you on track for an 8-week timeline.
Room-by-Room Decluttering Strategy
The room-by-room approach prevents overwhelm because you’re working in defined spaces rather than bouncing between closets, drawers, and shelves.
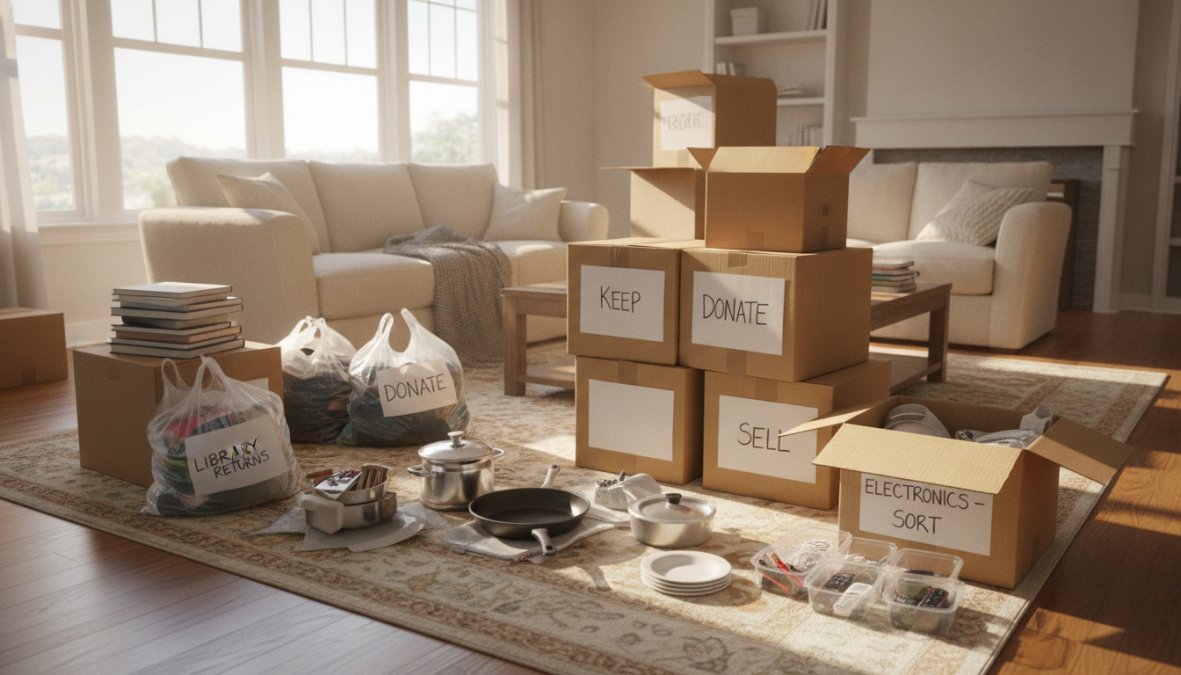
Start with spaces that have less emotional weight. Bathrooms and kitchens are perfect because decisions are straightforward. Once you’ve built momentum, approach emotionally charged rooms with better clarity.
For each room, set a timer for 45-60 minutes. Working in focused bursts prevents fatigue and keeps decision-making sharp.
Kitchen and Bathroom Sorting
Kitchens are deceptive, they look manageable until you find gadgets you forgot you owned. Pull out every item from cabinets and drawers. This is the only way to see what you actually have.
Ask these specific questions:
- Do I use this item at least once per month?
- Does it work properly?
- Do I have three of the same thing?
- Would I buy this again today?
Expired medications, supplements, and hazardous cleaning products should be thrown away, not packed. Check your local government website for hazardous waste collection days.
In the bathroom, check expiration dates on medications, supplements, and skincare products. Anything expired gets tossed. If you haven’t used it in a year, you won’t use it in your new home.
Bedroom and Living Areas
Bedrooms and living rooms contain more emotionally charged items. Be honest: if you haven’t worn clothing in two years, you won’t. Donate it. For books, keep only ones you’ll actually reread or reference.
Living room furniture decisions are bigger. If a piece doesn’t fit your new space or match your current style, selling or donating makes sense.
In bedrooms, sort through nightstands, closets, and under-bed storage. These hidden spaces accumulate forgotten items.
Avoid the “maybe” pile. Every item goes into Keep, Sell, Donate, or Trash. The “maybe” pile just delays decisions and adds stress.
Master the Four-Pile Method for Decluttering
The four-pile method is the most effective sorting system. It removes ambiguity and forces clear decisions.
Keep, Sell, Donate, and Trash Categories
As you go through each room, create four distinct piles:
Keep: Items you use regularly, genuinely love, or need for your new home.
Sell: Items in good condition with resale value. Furniture, electronics, books, and clothing are common candidates.
Donate: Items in decent condition but with no resale value. You get a tax deduction.
Trash: Broken items, expired products, anything unusable.
Every single item gets a decision. If you haven’t sold something within 3-4 weeks, move it to Donate. Don’t let unsold items delay your move.
Using a Staging Area for Organization
Set up a staging area in your garage, basement, or spare room. Label four large bins or sections clearly: Keep, Sell, Donate, Trash. As you sort through each room, items go directly into the appropriate pile.
Your staging area serves as a visual reminder of progress. Once a pile reaches a certain size, take action. Drop off donations weekly. List items for sale as soon as they hit the Sell pile. This keeps your staging area from becoming a storage facility.
For the Trash pile, arrange bulk pickup with your city or rent a dumpster if you have many items.
| Pile | Action | Timeline | Outcome |
|---|---|---|---|
| Keep | Pack with care | Week before move | Arrives at new home |
| Sell | List online, hold sale | Weeks 1-6 | Generate moving funds |
| Donate | Drop at charity | Weekly during weeks 1-7 | Tax deduction + space |
| Trash | Bulk pickup or dumpster | Week 7-8 | Cleared space |
What to Throw Away When Moving
Some items are better left behind because they’re unsafe, damaged, or genuinely unusable.
Expired Medications and Hazardous Items
Never pack expired medications. Check your local pharmacy, many offer free medication disposal programs. If not, check FDA guidance on medication disposal for safe disposal methods.
Hazardous items including cleaning supplies, paint, batteries, and propane tanks cannot go in moving trucks. Dispose of them through your local hazardous waste facility before moving day.
Old electronics should be recycled, not trashed. Check Earth911’s electronics recycling locator to find nearby options.
Expired food should be thrown away. Start fresh in your new home.
Bulky Items and Oversized Furniture
Measure your new rooms before deciding what furniture to keep. A sofa that fit perfectly in your old living room might overwhelm a smaller space.
Broken furniture and worn-out mattresses should be left behind. If you haven’t used an item in a year, it’s not worth moving. Consider selling large items locally rather than paying to transport them.
Take photos of large furniture items before decluttering. You’ll have images ready for online listings, speeding up the selling process.
How to Sell Items Before Moving
Selling items generates moving funds and reduces what you need to transport. Price items to sell, not to maximize profit. Used item buyers expect discounts.
Pricing and Listing Strategies
Use comparable listings as your guide. Check Facebook Marketplace, Craigslist, and eBay to see what similar items are actually selling for.
For furniture and large items, Facebook Marketplace and Craigslist work best. For books, clothes, and smaller items, consider Poshmark, Depop, or ThredUP.
Write clear, honest descriptions including dimensions, condition, and any flaws. Photos should show the item from multiple angles in good lighting.
Timing Your Sales for Maximum Results
Start listing items 4-6 weeks before your move. If items haven’t sold within 3-4 weeks, drop the price or move them to Donate.
Don’t wait until two weeks before your move to start selling. A sale at 80% of asking is better than no sale at all.
Digital Decluttering Before Your Move
Before moving day, back up important files to the cloud and organize digital documents into clear folders. Delete duplicate files, old emails, and photos you don’t need.
Update your address with banks, insurance companies, subscriptions, and government agencies. Cancel or transfer subscriptions you don’t use. Transfer digital photos to cloud storage and delete what you don’t need.
Involve Family and Friends in the Decluttering Process
Decluttering is faster and more enjoyable with help. Ask a friend to help sort through emotionally difficult items. An objective person can help you let go of things held onto out of guilt.
Involve children in decluttering their own spaces. This teaches decision-making skills and prevents resentment.
Set a decluttering party. Invite friends over, provide snacks, and work through a room together. You’ll accomplish more in three hours with friends than an entire weekend alone.
Decluttering before moving transforms a stressful process into a manageable project. By starting early, using the four-pile method, and tackling rooms systematically, you’ll arrive at your new home with only items that matter. When you’re ready to move, Crichton Removals handles expert packing, secure transport, and careful handling of your belongings. Our award-winning team in Geelong, Victoria, has helped thousands of families move stress-free. Get a quote from Crichton Removals and let us take the physical burden off your shoulders while you focus on your fresh start.
Frequently Asked Questions
How far in advance should I start decluttering before moving?
Begin your decluttering process 6-8 weeks before your moving day. This timeline allows you to work room-by-room without rushing, sort items thoughtfully, and arrange sales or donations. Starting early also reduces procrastination and stress. If you're moving locally in Geelong or across Victoria, an earlier start gives you flexibility to coordinate with professional movers like Crichton Removals for optimal scheduling.
What items should I definitely throw away when moving?
Discard expired medications, hazardous chemicals, broken electronics, and items with obvious damage. Remove perishable foods, old cosmetics, and heavily worn clothing. Don't move bulky furniture that's no longer functional or outdated. These items waste valuable moving space and often cost more to transport than replace. Focus your packing efforts on household goods that add genuine value to your new home.
How do I use the four-pile method effectively during my decluttering checklist for moving?
Designate four distinct areas or boxes labeled Keep, Sell, Donate, and Trash. As you sort each room, place items into the appropriate pile. Keep items you use regularly or truly value. Sell items in good condition with resale value. Donate usable but unwanted household goods to charities. Trash broken or unusable items. Work through one room at a time, completing all four piles before moving to the next space. This organized approach prevents decision fatigue.
Can I use sustainable disposal methods when decluttering for a move?
Yes. Donate usable items to local charities, community centers, or schools. Recycle electronics, metals, and paper responsibly through certified e-waste facilities. Compost organic materials. Sell items online or at garage sales to extend their life. Partner with professional movers who support sustainable practices. In Geelong, many local organizations accept donations, and recycling facilities handle bulk items responsibly. Sustainable disposal reduces landfill waste and often recovers value from items you no longer need.
This article was written using GrandRanker