

Table of Contents
- What You’ll Need: Essential Packing Materials for Fragile Items
- Step-by-Step: How to Pack Fragile Items for Moving
- How to Pack Dishes for Moving Without Damage
- How to Pack Mirrors and Artwork for Moving
- Moving Fragile Items Checklist: Documentation and Insurance
- Common Mistakes to Avoid When Packing Fragile Items
- Eco-Friendly Packing Alternatives for Fragile Items
- Post-Move Unpacking Strategy for Fragile Items
Last Updated: July 3, 2026
What You’ll Need: Essential Packing Materials for Fragile Items
Quality packing materials are the most important factor in preventing breakage during transit. Most people underestimate how much cushioning they need, a single layer of bubble wrap is rarely enough to absorb shock from potholes or uneven stacking.
Cushioning and Void Fill Options
Bubble wrap with 1-inch bubbles is the gold standard for fragile items. Wrap with bubbles facing inward toward the item, then add a second layer with bubbles facing outward for maximum shock absorption. Packing paper serves as your first line of defense before bubble wrap, protecting surfaces from moisture and providing a smooth working surface. Packing peanuts fill void spaces inside boxes to prevent shifting, use 2-3 inches on the bottom and sides of each box. Foam sheets offer rigid protection for flat items like mirrors or artwork, preventing the flexing that can crack glass.
Stack packing materials in order of use before you start wrapping. This cuts packing time in half and reduces the chance of forgetting a protective layer.
Boxes, Tape, and Labeling Supplies
Double-walled boxes prevent collapse under pressure and are essential for heavy or valuable items. For dishes, specialty dish barrels (approximately 16x12x28 inches) hold 40-50 plates safely and are worth the investment. Box size matters, wrapped items should fit snugly with 1-2 inches of packing material surrounding them on all sides.
Heavy-duty 2-inch packing tape is non-negotiable. Apply tape to the bottom seam, then reinforce all edges and corners. Bright red fragile labels on at least three sides of each box signal careful handling. Add "This Side Up" arrows on the top. Use a permanent marker to write box number, contents, and room destination on at least two sides, this creates an inventory record if damage occurs.
Step-by-Step: How to Pack Fragile Items for Moving
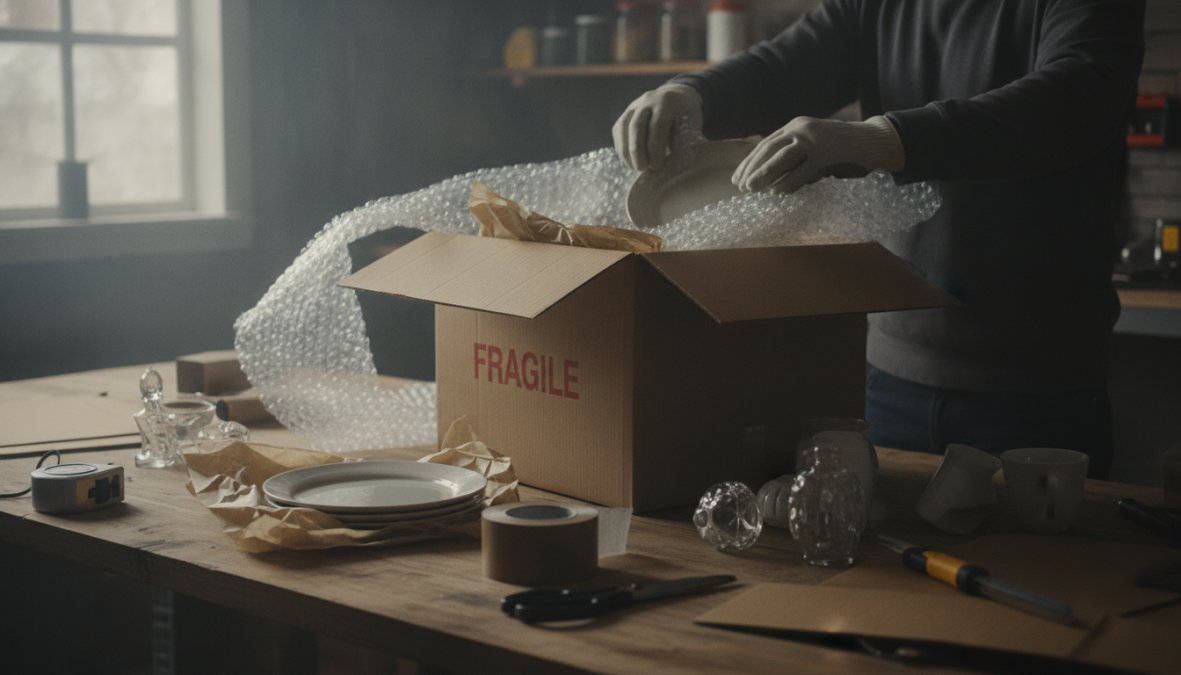
Step 1: Assess and Sort Your Fragile Items
Identify every fragile item in your home: dishes, stemware, decorative pieces, electronics, artwork, and mirrors. Create three categories: high-value items (collectibles, heirlooms, electronics), standard fragile items (everyday dishes), and low-value items. Group similar items together, all dinner plates in one box, all stemware in another. This prevents mixing items with different fragility levels and makes unpacking efficient.
Step 2: Choose Appropriate Box Sizes
Match box size to item type. Lightweight stemware can go in smaller boxes; heavier dishes need larger boxes so weight distributes across a bigger surface. Use dish barrels exclusively for dishes, standard moving boxes aren’t strong enough. For glassware, use smaller boxes (approximately 1.5 cubic feet) to prevent excessive shifting. For electronics and artwork, choose boxes that fit item dimensions closely.
Step 3: Wrap and Cushion Individual Items
Start with packing paper. Crumple several sheets and place them inside glasses or bowls before wrapping the outside. Wrap each item individually with 3-4 layers of packing paper, overlapping completely. Apply bubble wrap as your second layer with bubbles facing inward, then wrap again. For plates, stack wrapped plates with a layer of packing paper between each one. For stemware, wrap each glass individually, then place in a box with packing peanuts between each one, never nest stemware directly together.
One layer of bubble wrap is not enough. If you can see the item through the wrapping or feel its shape, add another layer.
Step 4: Layer and Fill Boxes Strategically
Pour 2-3 inches of packing peanuts into the box bottom before placing any wrapped items. Place heavier items on the bottom, lighter items on top. Surround items completely with packing peanuts, leave no gaps where items could shift. Fold flaps closed and apply 2-inch tape along the center seam, then reinforce both edges and all four corners. A properly sealed box should feel rigid and solid.
How to Pack Dishes for Moving Without Damage
Pack plates vertically, not horizontally. Vertical packing distributes weight along the plate’s edge rather than across its face, preventing cracks when boxes are stacked or bumped. Wrap each plate individually with at least three layers of packing paper, then apply at least two layers of bubble wrap. Separate each wrapped plate with a layer of packing paper to prevent chipping. Use a dish barrel for all plates, filling the bottom with 3 inches of packing peanuts, standing wrapped plates upright in rows, then adding 3 inches of packing peanuts on top.
For bowls, wrap individually with packing paper and bubble wrap. Place crumpled packing paper inside each bowl before wrapping the outside to prevent collapse. Nest wrapped bowls carefully with packing paper between each one.
Securing Stemware and Glassware
Wrap the bowl of the glass first with packing paper (3 layers) and bubble wrap (2 layers). Then wrap the stem separately, making sure it’s fully covered. Finally, wrap the entire glass one more time. Pack stemware in smaller boxes (1.5 cubic feet holds 12-15 wrapped glasses) standing upright, not lying down. Fill the bottom with 2 inches of packing peanuts, place glasses upright in rows, then fill around and above them with more packing peanuts. Never nest stemware directly together, each glass should be completely surrounded by packing peanuts.
How to Pack Mirrors and Artwork for Moving
Protecting Mirrors and Glass Frames
Mirrors must be packed flat, not standing upright. Wrap with packing paper first (at least 4 layers), then apply foam sheets at least 1/2 inch thick on both sides. Create a protective frame around mirror edges using foam or cardboard, securing with tape. This prevents edges from pressing directly against the box. Pack the mirror flat in a closely-sized box with minimal empty space filled by packing peanuts.
Wrapping Canvas and Valuable Art
Canvas paintings should never be wrapped in plastic. Use kraft paper instead, which allows the canvas to breathe while providing protection. Wrap with kraft paper, then apply a layer of bubble wrap (bubble side facing outward), then wrap with kraft paper again. Pack canvas paintings flat in a closely-sized box. Separate multiple paintings with kraft paper or cardboard, never let them touch directly. Valuable artwork deserves professional handling for specialized packing and insurance documentation.
The key difference between packing everyday items and valuable artwork is the number of protective layers and preventing any direct contact between the item and its container.
Moving Fragile Items Checklist: Documentation and Insurance
Creating an Inventory List
Create a detailed inventory before packing. List every fragile item by category with replacement values based on current retail price or appraisal value for antiques. Assign each item to a specific box number and write "Box 1, Kitchen Dishes: 12 dinner plates, 12 salad plates, 8 bowls. Value: $200" on the box itself and in a spreadsheet. Keep one digital copy and one printed copy stored separately.
Understanding Moving Insurance for Breakables
Standard moving insurance covers only $0.60 per pound regardless of actual value. Full-value protection is an add-on that covers full replacement value, essential for fragile items. Declare high-value items separately and request additional coverage. Document everything with photos: items before packing, boxes being packed, and boxes being loaded.
| Item Category | Typical Value Range | Recommended Coverage | Documentation Needed |
|---|---|---|---|
| Everyday dishes | $100-400 | Full-value protection | Inventory list, photos |
| Fine china | $500-2000+ | Full-value + separate rider | Appraisal, photos, inventory |
| Stemware sets | $50-300 | Full-value protection | Inventory list, photos |
| Artwork/mirrors | $200-5000+ | Full-value + separate rider | Appraisal, photos, professional packing documentation |
| Electronics | $300-2000+ | Full-value protection | Original packaging photos, serial numbers |
Common Mistakes to Avoid When Packing Fragile Items
Using too little wrapping material is the most common mistake. Items need multiple layers of different materials. Mixing fragile items with non-fragile items in the same box creates problems, keep fragile items with only other fragile items. Packing boxes too full prevents proper sealing and creates pressure on items. Never stack heavy boxes on top of fragile boxes. Failing to label boxes clearly leads to rough handling. Packing mirrors or artwork upright causes cracking. Not securing tape properly allows boxes to split open.
Eco-Friendly Packing Alternatives for Fragile Items
Recycled kraft paper provides cushioning without plastic content. Shredded paper or crumpled newspaper fills void space like packing peanuts and is free and recyclable. Biodegradable packing peanuts made from cornstarch dissolve in water and cost only slightly more. Recycled cardboard boxes work as well as new boxes and are often available free. Cloth towels or old linens can wrap fragile items, secured with twine instead of plastic tape.
Mix sustainable and traditional materials for best results. Use recycled kraft paper and newspaper for wrapping, biodegradable peanuts for void fill, and recycled boxes for containers.
Post-Move Unpacking Strategy for Fragile Items
Unpack fragile boxes first, when you’re fresh and focused. Set aside a clean workspace for unpacking. Unwrap items carefully and inspect them immediately for damage, documenting with photos if needed. Wash items before putting them away to remove dust and residue. Return items to original locations gradually rather than rushing. Keep packing materials and boxes for at least a week after the move in case damage is discovered later. Keep professional packing documentation for valuable items to support insurance claims.
Packing fragile items correctly transforms a daunting task into a manageable process. Protection comes from multiple layers of different materials, proper box selection, and careful labeling. For complex moves involving high-value items, artwork, or large quantities of fragile goods, Crichton Removals offers professional packing services with specialized handling and insurance documentation. Our team in Geelong has decades of experience protecting delicate items through moves across Victoria and beyond. Get a quote from Crichton Removals today.
Frequently Asked Questions
What is the best way to pack fragile items for moving?
The best way to pack fragile items for moving involves using appropriate cushioning materials like bubble wrap and packing paper, selecting correctly sized boxes, wrapping each item individually, and filling void spaces to prevent shifting. Layer heavier items on the bottom, lighter fragile items on top, and clearly label boxes as fragile. This approach minimizes shock absorption issues and protects your breakables during transit.
What materials do I need to pack fragile items?
Essential packing materials include bubble wrap, packing paper, corrugated cardboard boxes, packing peanuts or foam sheets for void fill, strong packing tape, a tape dispenser, and fragile labels. For high-value items, consider shrink wrap and double boxing. Eco-friendly alternatives include recycled paper, shredded newspaper, and biodegradable packing peanuts. Having these supplies on hand ensures you can properly cushion and protect all types of breakables.
How do you pack fragile glassware for moving?
Pack fragile glassware by wrapping each piece individually with bubble wrap or packing paper, securing with tape. Use dish barrels or sturdy boxes with plenty of padding on the bottom. Nest similar items carefully, placing heavier glasses at the bottom and delicate stemware on top with extra cushioning. Fill all gaps with packing peanuts or foam sheets to prevent movement. Label boxes clearly with 'This Side Up' and 'Fragile' warnings for safe handling.
How do you label boxes containing fragile items for moving?
Label fragile boxes clearly on multiple sides with 'Fragile' stickers or markers, include 'This Side Up' indicators with arrows, and write the contents and room destination. Create an inventory list matching box numbers to contents for insurance and unpacking purposes. Use bright colors or waterproof markers for visibility. This labeling system helps professional movers understand handling requirements and assists with post-move unpacking organization.
This article was written using GrandRanker