
Table of Contents
- Why Efficient Box Labeling Matters for Moving Day
- Essential Supplies for Labeling Moving Boxes
- How to Label Moving Boxes Efficiently: Step-by-Step Process
- Color Coding Moving Boxes for Quick Identification
- Moving Box Numbering System and Inventory Tracking
- Security Considerations When Labeling Boxes
- Common Mistakes to Avoid When Labeling Moving Boxes
- Labeling Strategies for Different Moving Scenarios
Last Updated: July 6, 2026
Why Efficient Box Labeling Matters for Moving Day
Moving involves hundreds of small decisions, but one choice separates smooth transitions from chaotic unpacking: how you label your boxes. At Crichton Removals, we’ve coordinated thousands of moves across Victoria and seen firsthand how labeling systems either save hours or cost them.
Efficient labeling isn’t just writing "Kitchen" on cardboard. It’s creating a system that lets you find what you need immediately, prevents damage to fragile items, and gives you complete visibility into what’s packed and where. Many movers spend their first week searching through unmarked or poorly labeled boxes, that’s preventable.
The difference between chaos and organization comes down to three things: consistent labeling systems, detailed content descriptions, and strategic label placement where you can actually see them.
Essential Supplies for Labeling Moving Boxes
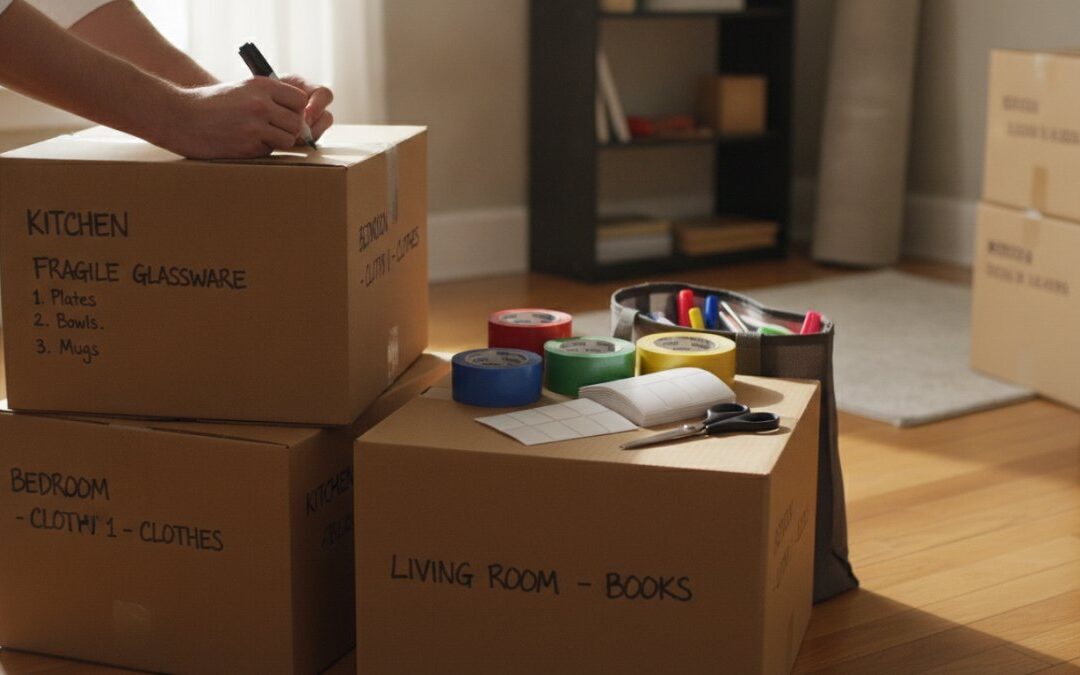
You can’t label boxes efficiently without the right tools. Permanent markers in multiple colors, quality labeling tape, and a consistent writing surface make an enormous difference in visibility and durability.
Best Markers for Moving Boxes
Permanent markers like Sharpies are non-negotiable. They don’t smudge when wet, don’t fade in sunlight, and write clearly on cardboard without bleeding through. The broad tip lets you write large, legible letters quickly, fine-tipped markers create text too small to read from across a room.
Keep 3-4 different colors on hand for color-coding. Black and blue are essentials; add red for fragile items and green for storage. Test your markers on a spare box before labeling in bulk, as some perform poorly on cardboard texture.
Labeling Tape and Adhesive Options
Clear packing tape serves two purposes: it seals boxes and protects labels from moisture and damage during transport. After writing with permanent marker, apply clear tape over the label area to prevent fading or smudging.
For large moves (50+ boxes), consider white or colored adhesive label sheets designed for moving boxes. They provide a clean surface for writing or printing. For most residential moves, permanent marker plus clear packing tape is fastest and most practical.
How to Label Moving Boxes Efficiently: Step-by-Step Process
The most efficient system combines four elements: consistent format, labels on multiple sides, detailed descriptions, and strategic placement. Once established, you’ll label each box in under five minutes.
Step 1: Prepare Your Labeling System
Before packing, decide on your labeling format: destination room, contents summary, and box number (if using an inventory system). Write this on a test box and time yourself, most people label a box in 2-3 minutes once in rhythm.
Label both the top and front side of each box. The top is most visible when stacked; sides are visible when boxes stand upright. This ensures your label remains visible regardless of orientation during transport.
Set up a labeling station near your packing area with all markers, tape, and label sheets in one spot. This five-minute setup saves thirty minutes over the course of a move.
Step 2: Label Multiple Sides of Each Box
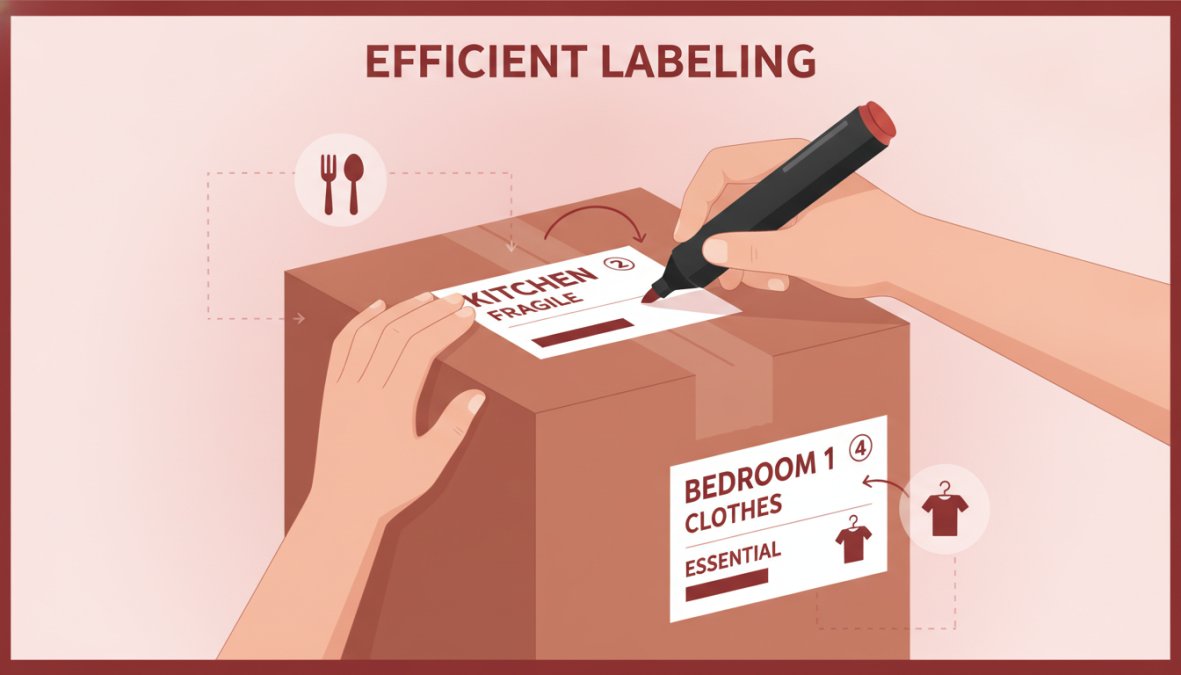
A label on only one side becomes invisible once stacked or turned during loading. Label at least two sides: the top and one vertical side.
The top label should be large and legible from six feet away, with the room name in capital letters. The side label serves as backup with the same information. For long-term storage, label three sides: top, front, and spine.
Use consistent placement for each label. If the room name always appears in the top-left corner, you’ll develop a scanning pattern that lets you find boxes faster.
Step 3: Write Detailed Content Descriptions
"Kitchen" tells you the room but nothing about contents. "Kitchen, Plates, bowls, glasses" tells you whether you need to open that box to find your coffee maker.
Write a brief summary of 3-5 specific items below the room name, focusing on what you’ll actually search for first. For fragile items, add a note: write "FRAGILE, Glassware" instead of just "Kitchen."
This detail prevents the frustrating experience of opening five boxes to find one item and helps you prioritize unpacking.
Step 4: Apply Labels for Maximum Visibility
The most visible placement is the top surface, centered, with text parallel to box edges. If color-coding, place the colored label on the top corner where it’s immediately visible.
Apply clear packing tape over labels after writing to protect them during the move. For boxes in storage, label the spine if it will sit on a shelf with the spine facing outward.
Color Coding Moving Boxes for Quick Identification
Color-coded labels transform your boxes from identical cardboard into an organized system you can navigate visually. Instead of reading every label, you spot colors and instantly know which boxes belong where.
Setting Up Your Color-Coded System
Choose 5-6 colors and assign each to a room or category: blue for bedroom, green for living areas, red for fragile items, yellow for kitchen, orange for bathroom, purple for miscellaneous. These colors are distinct enough to spot across a room.
Write your color assignments on paper and keep it visible during unpacking. Apply color through colored tape, stickers, or colored marker stripes across the top of each box. Tape is most visible and durable.
The advantage is speed: movers can place boxes in correct rooms based on color alone, and you can spot misplaced boxes immediately.
Room-by-Room Organization with Color Labels
Assign one color to each primary room. For multiple bedrooms, use the base color with secondary labels (Bedroom 1, Bedroom 2) or different shades of blue.
This system is particularly valuable with family members or professional movers. Everyone understands the color code without detailed explanations.
Moving Box Numbering System and Inventory Tracking
A numbering system creates a master record of what’s packed and where. Number each box sequentially and create a spreadsheet with columns for: Box Number, Room, Contents, and Notes.
When you can’t find your coffee maker, search the spreadsheet for "coffee maker," find it’s in Box 7, and retrieve it immediately. For moves with multiple people, a numbered system prevents duplicate packing or missed items.
| Box Number | Room | Contents | Special Notes |
|---|---|---|---|
| 1 | Kitchen | Plates, bowls, glasses | Fragile |
| 2 | Kitchen | Pots, pans, cooking utensils | Heavy |
| 3 | Bedroom | Bedding, pillows, blankets | None |
| 4 | Living Room | Books, decorative items | Heavy |
| 5 | Bathroom | Towels, toiletries, shower items | None |
Digital Inventory Integration for Long-Term Storage
For long-term storage, use a digital inventory system accessible from your phone. Photograph each labeled box and upload the image with notes about contents and location.
This creates a visual record you can reference months or years later without opening boxes. Many storage facilities now support app-based tracking; if not, a simple cloud document works perfectly.
Security Considerations When Labeling Boxes
Detailed labels advertise what’s inside to anyone watching the move. A label reading "Electronics, TV, laptop, gaming console" tells potential thieves which boxes are valuable.
For high-value items, use generic descriptions or codes instead of specific contents. Write "Electronics" instead of listing what’s inside.
Don’t label boxes with your name and new address prominently. If you need address information for movers, write it on the inside of the box or on a separate manifest they carry.
Common Mistakes to Avoid When Labeling Moving Boxes
The most common mistake is writing too small. Labels readable from six inches away become illegible from six feet away. Write large enough that text is visible from across a room.
Another frequent error is labeling only one side. That labeled side inevitably faces inward in a stack, rendering it invisible. Always label at least two sides.
Using pencil instead of permanent marker is a mistake that reveals itself during the move, pencil smudges and fades. Standardize your labeling format and stick to it for every box. Protect labels with tape to preserve legibility throughout the move.
Labeling Strategies for Different Moving Scenarios
Different moving situations call for slightly different approaches. For local moves where boxes unload within days, room name and contents summary are sufficient. For interstate moves or long-term storage, add extra protection, more detailed descriptions, and number every box.
Eco-Friendly Labeling Solutions
Reusable label stickers made from recycled materials work as well as traditional labels and can be removed and reused. Chalkboard labels let you erase and rewrite, enabling box reuse. Water-soluble labels dissolve when exposed to water, leaving no residue on boxes for recycling.
The most eco-friendly approach is using permanent marker directly on boxes without protective tape, though labels fade faster without protection.
Accessibility-Focused Labeling for Special Needs
Use high-contrast colors (black text on white labels or white text on dark labels) for easier reading. Increase font size significantly, 1-2 inch letters dramatically improve readability.
Consider adding QR codes that link to digital inventory or braille labels. Tactile labels with textured surfaces work particularly well for identifying fragile items.
Efficient box labeling is the difference between unpacking quickly or spending weeks searching for items. The system outlined here, consistent formatting, multiple-side labels, detailed descriptions, and strategic placement, takes minimal extra time during packing but saves hours during unpacking and storage.
If you’re planning a move in Geelong or across Victoria, Crichton Removals can handle packing and labeling for you. Our team applies professional labeling systems including color-coding, numbering, and detailed inventory tracking. We offer secure storage options and can advise on labeling strategies for long-term storage. Get a quote today and let our team manage the logistics while you focus on the transition.
Frequently Asked Questions
What is the best way to label moving boxes efficiently?
The best approach combines multiple strategies: use permanent markers for clarity, label at least two adjacent sides of each box, include detailed content descriptions, assign box numbers, and maintain a moving inventory list template. Color-coded labels for destination rooms and a numbering system dramatically improve unpacking efficiency. This layered approach ensures boxes are visible from any angle and you can quickly locate specific items without opening every box.
Should I label the top or sides of moving boxes?
Label both the top and adjacent sides of your boxes. When boxes are stacked during transport and storage, the top may not be visible. By labeling multiple sides, you ensure visibility regardless of how boxes are positioned. The top label should include the destination room and brief contents summary, while side labels reinforce this information. This redundancy prevents confusion and speeds up the unpacking process significantly.
How do I create an effective moving inventory list template?
Start with a spreadsheet or digital tool that includes: box number, destination room, contents summary, fragile item notation, and box weight. Assign each box a unique number and cross-reference it with your moving inventory list template. For long-term storage situations, add columns for storage location and access frequency. Consider digital inventory integration that lets you photograph box contents, this creates a searchable database for future reference and helps prevent loss or damage to essential boxes.
What markers and supplies work best for labeling moving boxes?
Use permanent markers specifically designed for moving boxes, they won't smudge or fade during transit. Pair these with clear packing tape to secure labels and protect them from moisture. For color-coded systems, invest in quality colored markers or colored tape that stands out clearly. Avoid ballpoint pens and regular markers, which fade easily. For eco-friendly options, consider biodegradable labeling tape and recycled cardboard labels. The best markers for moving boxes are oil-based permanent markers that write clearly on cardboard and resist water damage.
This article was written using GrandRanker